Easy Merchant Services & Merchant Accounts
Allow your customers to withdraw crypto to fiat on your platform using Wyre
For Merchants, Processors and Point-of-Sale Solutions
If you are operating or launching a payment processing gateway or point-of-sale solution, your merchant users can accept crypto and off-ramp any supported combination of fiat and crypto using Wyre.
The Flow at a High-Level:
- Onboard your company in the Wyre test dashboard.
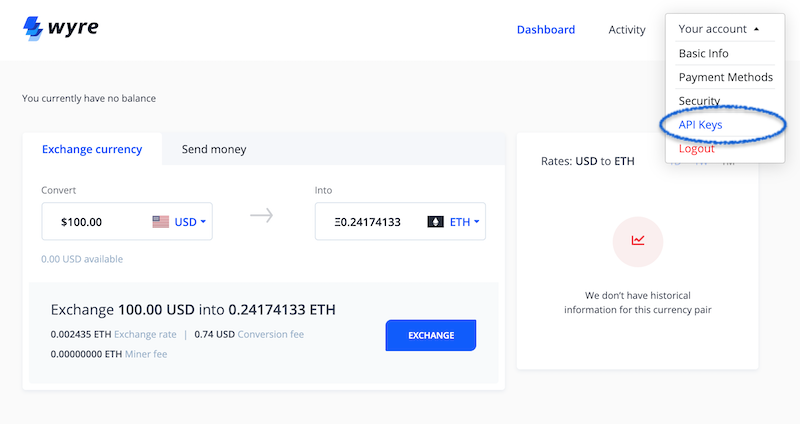
- Get your Account ID and API Keys from the dash.
- Create a Wallet for your users to hold crypto.
- Connect a Bank to receive fiat payouts.
- Use Transfers to withdraw crypto to a connected bank.
Steps 1-2 - Business Account Setup
You will need to register your business with Wyre to access our API using your API Keys.
Business Account Setup:
- Test dashboard access.
- Production dashboard access.
- Select the proper environment.
- Authenticate and sign requests.
- Contact [email protected] for production access.

Wallet & Bank Actions
Step 3 - Creating Wallets
Once a new user registers on your platform, create a wallet for that user. This user is under your control, and stored on Wyre. To the end user, they only ever see your brands look/feel. Not Wyre.
Wallets are used to custody crypto on your platform. Each wallet generates new BTC and ETH addresses. Wyre can support a number of ERC20 tokens using the same ETH address. View the Supported Currencies.
It is possible to create wallets in three categories, DEFAULT, ENTERPRISE and SAVINGS. If your app or users would benefit from holding crypto and earning interest, consider creating a Wyre+ Rewards Wallet. Contact sales to activate the Rewards feature and discuss interest rates.
Creating Wallets:
- Create wallets for your merchant users.
- Save the returned identifier that gets generated in the response as this will be used later to create transfers.
Step 4 - Connecting a Bank
Once a new merchant user has a wallet, you can attach a bank account to send fiat payouts via ACH. Within the Wyre API we call bank accounts "payment methods." This process attaches a merchant user's payment method to your platform's Wyre account.
Connecting a Bank:
- Connect a payment method.
- Set the "chargeablePM" parameter to "false." This makes the payment only available for receiving funds.
- When setting "chargeablePM: false" the payment method status will remain "AWAITING_FOLLOWUP." This allows you to bypass the bank statement upload requirement.
- If you set "chargeablePM: true" or leave at the default setting a bank statement upload will be required.
- Save the returned identifier that gets generated in the response as this will be used later to create transfers.
Step 5 - Creating Transfers
Once a new user has an account and an attached bank (payment method), they can start transferring funds if the account has a balance.
Creating Transfers:
Transfers use the Create Transfer endpoint. Transfers can happen between wallets, payment methods and crypto addresses.
Transfers utilize our SRNs. This is important because the SRNs are concatenated to the referenced IDs in the transfer. For example transfers between accounts have SRNs that look like this:
"source":"wallet:WA_XXXXXXXX2",
"dest":"paymentmethod:PA-W7YN28ABCHT",Save the returned identifier that gets generated in the response as this will be used later to track transfers.
The Off-Ramp Process
Step 5 above describes the Create Transfer endpoint. This can be used to transfer funds out of an account. Both crypto to fiat can be off-ramped as determined by the dest, sourceCurrency, and destCurrency parameters .
Off-Ramping
- The merchant user can create a Transfer to push funds from their account to their connected payment method.
In our example, the merchant would create a transfer from their
SAVINGSwallet to their attached payment method, like below."source":"wallet:WA_XXXXXXXX2",
"dest":"paymentmethod:PA_W7YN28ABCHT",A merchant could also create a transfer from their Bitcoin
SAVINGSwallet to another crypto wallet, like below."source":"wallet:WA_XXXXXXXX2",
"dest":"bitcoin:1DDfMQLTd8RhGzoyWyr1ENVdoeGaoq2MZH",To see the full list of required parameters for a transfer click here.
Updated almost 4 years ago
