Building a Venmo Style Application
Enable customers to deposit and withdraw funds on your platform
For Non-Custodial Wallets / Decentralized-Exchanges / Fintechs
If you are a non-custodial crypto app, decentralized exchange or traditional fintech, your users can on-ramp and off-ramp any supported combination of fiat and crypto using Wyre.
By "non-custodial" we mean you don't touch users' private keys. This includes MEW, MetaMask, BRD, and any non-custodial exchange.
High Level Flow
- Onboard your company in the Wyre test dashboard.
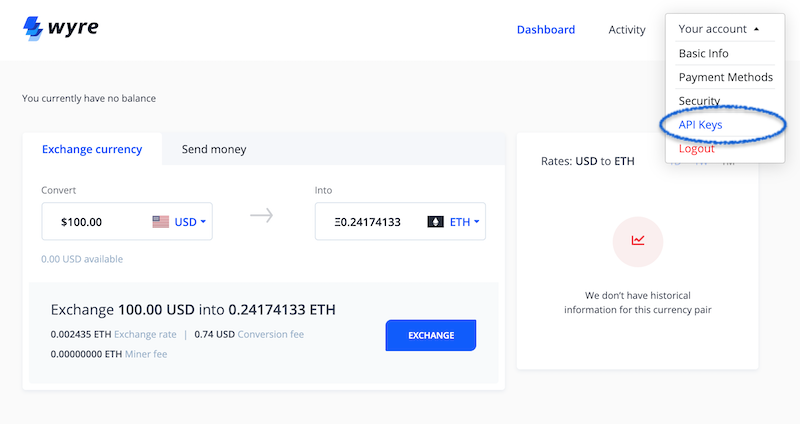
- Get your Account ID and API Keys from the dash.
- Create Accounts for your users to hold fiat and crypto.
- Connect a Bank to receive fiat payouts.
- Use Transfers to send fiat and crypto between users and process payouts to a connected bank.
- (Optional) Integrate Checkout - Hosted Dialog in order to fund a crypto wallet on the account.
- Deposit Funds with ACH to transfer fiat into the account via the connected bank.
Steps 1-2 - Business Account Setup
You will need to register your business with Wyre to access our API using your API Keys.
Business Account Setup Notes:
- Test dashboard access.
- Production dashboard access.
- Select the proper environment.
- Authenticate and sign requests.
- Contact [email protected] for production access.

Account Actions
Step 3 - Creating Accounts
Once a new user registers on your platform, Create an Account for that user. This user is under your control, and stored on Wyre. To the end user, they only ever see your brands look/feel. Not Wyre.
Creating Accounts:
- Create users as subaccounts by setting the
subaccountparameter to true.- Use masquerading to move funds on behalf of your subaccounts.
- Each account will automatically be assigned a unique BTC & ETH address. The ETH address also supports Wyre's integrated ERC20 tokens: Supported Currencies.
- Each account will also support holding a balance in multiple fiat currencies: Supported Currencies.
- It may be necessary to upload additional documents to create an account, such as a driver's license or passport photo. Use the Upload Document endpoint to handle these scenarios.
- Save the returned "id" that gets generated in the response as this will be used later to create money transfers.
Step 4 - Connecting a Bank
Once a new user has a new account, attach a bank account to send fiat payouts and load currency via ACH.
Connecting a Bank:
- Connect a user's bank account using our Plaid module and pass the returned public key to the Create Payment Method endpoint.
- In some cases a user may be asked to upload additional information such as an ACH Authorization form or further identification. Review the Payment Method Edge Cases to learn more.
- Save the returned "id" that gets generated in the response as this will be used later to create money transfers.
Step 5 - Creating Transfers
Once a new user has an account and an attached bank (payment method), they can start transferring funds if the account has a balance.
Creating Transfers:
Transfers use the Create Transfer endpoint. Transfers can happen between accounts, wallets, payment methods and crypto addresses.
Transfers utilize our SRNs. This is important because the SRNs are concatenated to the referenced IDs in the transfer. For example transfers between accounts have SRNs that look like this:
"source":"account:AC_XXXXXXXX2",
"dest":"account:AC_XXXXXXXX3",Accounts can transfer from their balance or from an ACH pull to another account. Transfers via ACH require the :ach SRN postfix, like this:
"source":"paymentmethod:PA-W7YN28ABCHT:ach",
- Save the returned identifier from the response as this will be used later to track transfers.
On-Ramp Solutions
Step 6 - (Optional) Integrate Checkout - Hosted Dialog
Once a new user has an account and an attached bank (payment method), they can fund their account with crypto using the Checkout Widget - Hosted Dialog or the White-Label Card Processing.
Integrate Checkout - Hosted Dialog:
- Both the Checkout Widget and White-Label Card Processing require the creation of Wallet Order Reservations. Your account must be approved in order to activate Wallet Order Reservations.
Step 7 - (Optional) ACH Funds In and ACH Transfer
Once a new user has an account and an attached bank (payment method), they can fund their account with USD via ACH transfer.
ACH Funds In and ACH Transfer:
- The user can Create a Transfer to deposit funds into their Wyre account from a connected payment method.
- An ACH funding transfer requires the :ach SRN postfix, like this:
"source":"paymentmethod:PA-W7YN28ABCHT:ach",
Off-Ramp Solutions
Step 5 above describes the Create Transfer endpoint. This can also be used to transfer funds out of an account. Both crypto and fiat can be off-ramped as determined by the dest, sourceCurrency, and destCurrency parameters .
Off-Ramp Notes
The user can Create a Transfer to withdraw funds from their account to their connected payment method. This transfer could be fiat -> fiat or crypto -> fiat.
"source":"account:AC_XXXXXXXX2",
"dest":"paymentmethod:PA-W7YN28ABCHT",
Updated almost 4 years ago
